
Depending on your experience, you may be used to a previous version of Drupal, so we listed the greatest differences between Drupal 10 and previous versions below.
Editing Changes
The WYSIWYG (what you see is what you get) editor on your Drupal site is provided by the CKEditor module. With the Drupal 10 update, this editor will be updated to the newest version — five. CKEditor 5 has many of the same functions and features as the previous version, with some improvements.
Tables
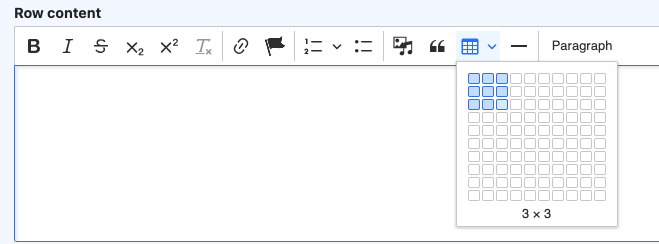
It's now easier to add and edit tables in the WYSIWYG. To add a table, select the table button from the WYSIWYG toolbar. Similar to adding a table in Microsoft Word or Google Docs, just select the dimension you want for the table:
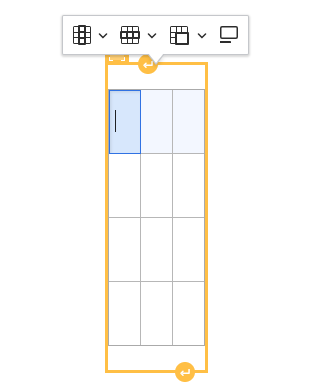
Once you've added a table, you can make edits like setting header rows or columns, adding or removing rows and columns, and adding a caption, from the table toolbar:
Lists
Creating an ordered or unordered list in the WYSIWYG is now a little easier with autoformatting. Before, you'd need to select the list option from the WYSIWYG toolbar, now, if you type “1.”, it will automatically format as an ordered list. The same works if you type “-” to start an unordered list.
Advanced Settings
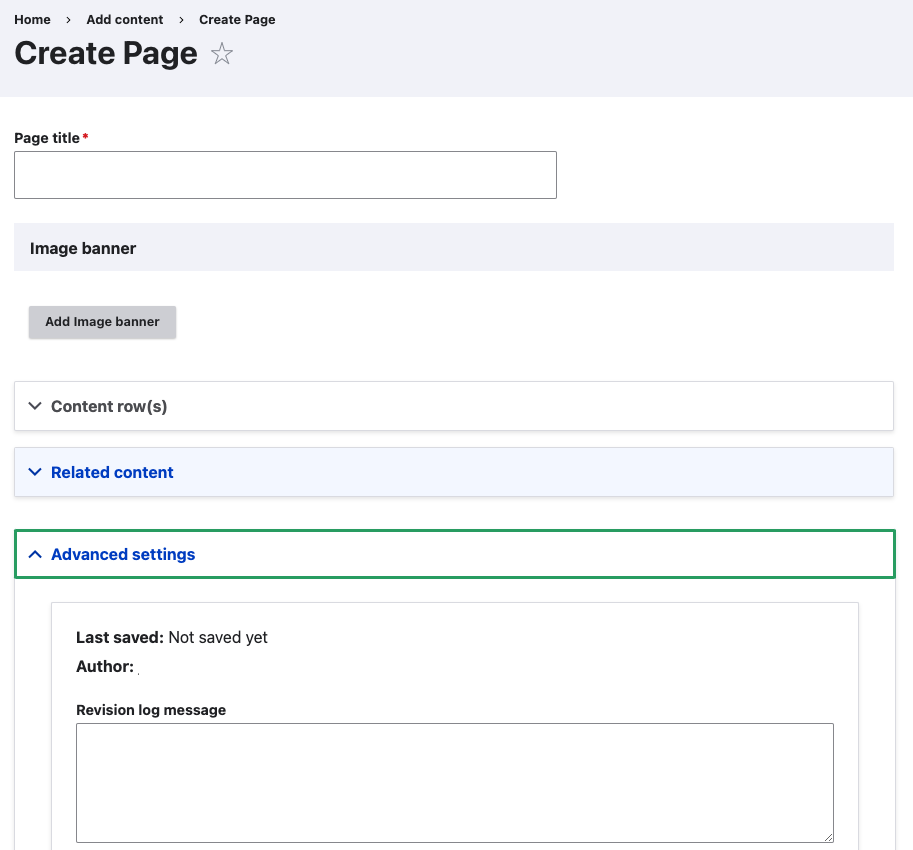
You may also find that some things have moved around when editing content. Notably, advance settings for a node are no longer in a right-hand sidebar. Instead, these settings can be found in an accordion at the bottom of the edit page.
Links and the Media Library
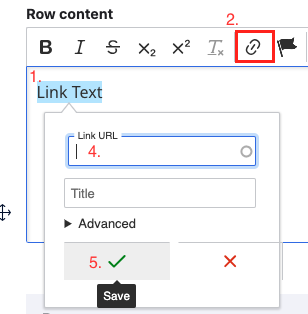
A lot has changed for linking in D10, but creating a simple link from one webpage to another is still largely the same. To create a link, you can follow the same steps you always have:
- Highlight your link text
- Select the link button from the WYSIWYG editor
- Instead of having a pop-up open to add the link URL or browse the file library, the link editor box will appear in the WYSIWYG editor
- Add a URL, link title, or tweak the advanced settings
- Select the checkmark button to add your link
There are a number of more significant changes to linking, particularly when it comes to linking to a media item. Watch the following video for a quick overview of these changes, or see our step-by-step instructions below:
Linking to an existing document
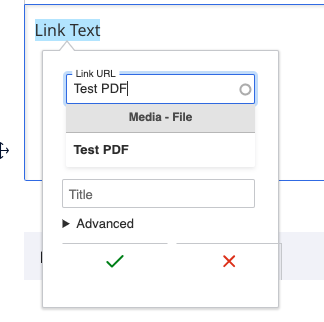
When linking to an existing document, or a document already on your site and in your media library, follow the same steps to create a regular link. When you're asked to provide a Link URL, start typing the document name into the field. A list of documents you can link to will appear, and you can select the document you're looking for to create a link to it. Select the checkmark to save your link, and then you're done.
Linking to a new document
If you would like to add a document to your site and then link to it, the process looks a little different from before:
- Start by adding your document to the media library. Go to Content > Media Library > Add Media, and select the media type you would like to add (select Files for a PDF). Upload a file and give the media entity a name.
- Navigate to the page you would like to add a link to. From the edit screen, follow the same steps to create a link. When asked for the Link URL, type in the name you just gave your new file. It should appear as an option; select your file from the list and save your link.
The file linking media library connection module is not yet compatible with CKEditor 5. This is why you cannot, currently, upload a file while create a link. However, we are monitoring progress on this compatibility and are anticipating a feature release soon.
Note: As of late March, media linking is available. As it was in previous CKEditor versions, you can now add and link media from the media library by selecting the link icon in the WYSIWYG. This feature will be implemented on all websites released to D10 going forward.
Upanup is working on retroactively adding this feature to any site released prior to the availability of this module. If you notice your website doesn't have this functionality, please reach out to support to check on the status.
Adding Images
Adding images remains largely the same. To add an image within the body content, just select the insert media button from the WYSIWYG toolbar:

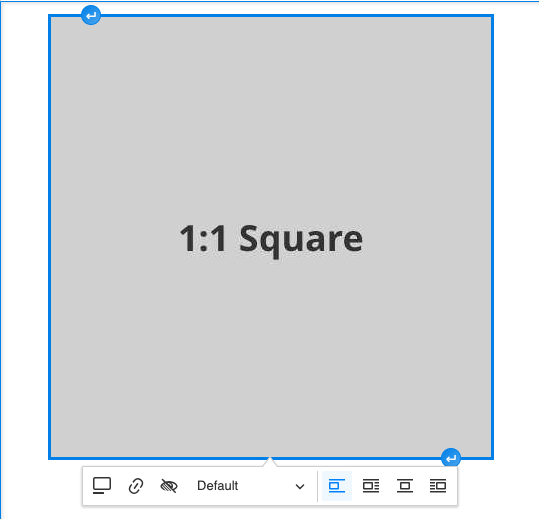
You can then upload a new image or select an existing image from the media library. Once you've added your image, you can adjust the alignment, add a caption, change the size, or replace the existing alt text (to match the current context), from the toolbar that appears when the image is selected.
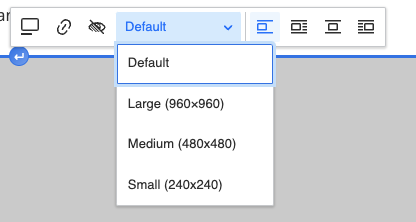
When adjusting the size of the image, you will be given three default size options:
Linking Images
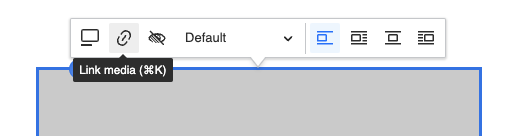
You can also add accessible links to images with the new CKEditor5. Once your media has been added, use the link button to add an internal, or external link. The image will be linked in a way that provides context for your users, making it accessible.
Bulk Page Management
Being able to manage pages in bulk can make the content governance process easier. With Drupal 10, you can change the author of multiple pages, delete pages, or update the URL alias of pages with the new bulk editing toolbar from the content page.
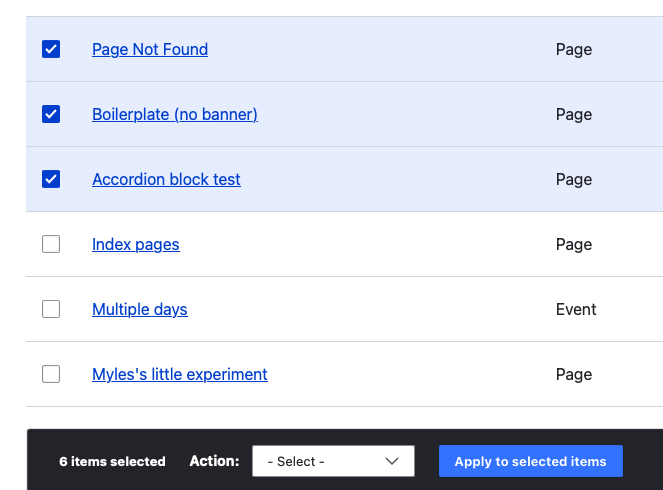
Start selecting pages using the checkboxes, and the bulk editing toolbar will appear. You can then select the desired action and apply that action to all selected pages.
Accessibility Changes
This update comes with some new features to ensure accessible content. The accessibility checker, previously located in the WYSIWYG, can now be accessed in the front end. This change helps bring focus to page accessibility, while other new features put emphasis on learning and improving your content's accessibility.
Here is a demo highlighting the features Editoria11y Accessibility Checker
See the new checker in action: